Membership Training Version 12
Links
Orientation Training Objective
Brown County wants to ensure that all members have a safe and enjoyable experience using your Club. We also want to ensure that all members are able to properly operate the equipment for both their use and for those that will use the club after they are done. Please leave the club better than when you found it.
So currently we ask that you read the material and ask questions of a board member.
In the future we hope to offer Training Classes and a certification test.
Please text a board member with follow up questions. They are listed at the end of this document.
Basic Introduction – Equipment operations and safety.
Safety.
- Proper PPE is required for all people on the fields.
- Safety Glasses
- Hearing Protection – plugs and/or passive or electronic earmuffs.
Gun Safety.
- Open action when not at the shooting station.
- Safety
- Only loaded in the shooting station. Load only the number of shells that are required to complete your turn. Do not load or close your action until it is you turn to shoot. Clear the gun of all live shells before you leave your shooting station.
- Only load single shell in trap
- Two shells for Skeet except load singles when you are shooting an option or at 8. At these positions load a single.
- Two shells for 5 – Stand.
- Always verify the action is clear and action open before leaving the station.
- Always only have your gun pointed down range when loaded.
- Don’t go downrange of the trap thrower without pausing shooting at the adjacent fields.
- Pause shooting and clear downrange if someone or something is downrange.
- Club is for shotgun use only. No rifles or hand guns are allowed.
- No shot larger in diameter than 7 ½ is allowed and no velocities over 1330 FPS.
- No shooting allowed after the consumption of alcohol.
- Only loaded in the shooting station. Load only the number of shells that are required to complete your turn. Do not load or close your action until it is you turn to shoot. Clear the gun of all live shells before you leave your shooting station.
Memberships
- Regular Membership is $65 per year (under 65),
- $80 for Family Membership (spouse and minor children),
- Senior Membership is $40 (65 or over).
- Senior Family Membership is $55.
- Juniors (under 18) qualify for a no-charge membership.
- Fishing requires a current club membership.
Card System
- $5 fee for each card -one time.
- Trap and Skeet Card $6 per round
- 5-StandCard $7 per round
- Adding rounds to the card.
- Needs to be done during club hours.
- The bartender or shooting manager will be able to load your card.
- Clear the count at the end of shooting.
- Loss of the card is the owners’ responsibility and not the clubs.
Keys for Field Access.
- Keys are available from the bartenders during open hours.
- Ensure that they are returned to the bar so they are available to other users.
- Keys are available in lock boxes on the field.
- A lock box is located at light post labeling field 1
- A lock box is located at light post labeling field 3
- A lock box is located at light post labeling field 5
- A lock box is located at light post on east side of field 6
- Contact one of the Board members for the access code to the lock boxes.
Available hours.
- Hours open to Shooting are 8:00 to Dusk and during League hours when fields are available.
- Club House Hours
- Saturday 12:00PM – 4:00PM
- Wednesday 9:00AM – 1:00PM
- League Night 6:00PM—10:00PM
- Tuesday and Thursday year round and Wednesday during the summer.
- Key box access and operations training is required for off hours shooting.
Refilling Houses.
- Club Members shall refill the house when they are opening or closing the house when the thrower has space for a full stack of birds from the clay box packs.
- This height is 7 inches of open space in a throwers carousel.
- This creates shared ownership of filling and keeps the throwers filled for everyone’s shooting needs.
Waste Management.
- Shovels or Brooms are on fields to allow cleanup of the fields of Snow and Broken Target.
- Use these to keep your shooting space clear and safe.
Cardboard goes in the grey dumpsters.
- Located between Field 1 and 2, Field 3 and 4 and Field 5 and 6.
- Breakdown the cardboard and feed it through the slot so it can be disposed of efficiently.
Aluminum Can Disposal.
- Containers are located in the center of each field for the disposal of Aluminum beverage containers.
- These are the grey containers with the tops with the round holes
- Only aluminum cans should go in these containers.
All other waste.
- All other waste should go in the orange containers at the center of each field.
- This includes plastic bottles, shell boxes and spent shells.
Protocol with other club uses.
- Hadicaped Parking – Club has ample parking. Handicap area is near near club house.
- No Parking – The area in front of the shop and equipment garage (Warehouse 1} is a No Parking area. Leave this space open at all times for those members that volunteer their time to have access to the equipment they need to maintain and service the club.
- Rules with Volunteer Work and Lawn Mowing. No shooting when volunteers are maintaining the facility down field of the range.
- Rules on the Field: Be quiet when other people are shooting.
Equipment Safety
General
- The follow is the recommendations from each of the equipment operators.
- Follow their recommendations when loading and powering on the equipment and shutting down the equipment.
- Understand the terminology may be different from manufacturers but the functions match.
| Function | ON (Maintained) | OFF (Maintained) | RELEASED(Spring Return) |
| Alternate Names | ONARMED COCKED | OFFDISARMED DECOCKED/UNCOCKED | RELEASE DISARM UNCOCK |
| Function | Spring loaded and ready to be released | Power removed. Release function must be done before going to the off position to ensure spring tension is released. | Releases the throwing arm from the armed position and releasees a bird. Also releases spring tension. |
Pat Trap (Trap House)
- Know and understand the armed and disarmed position of the throwing arm.
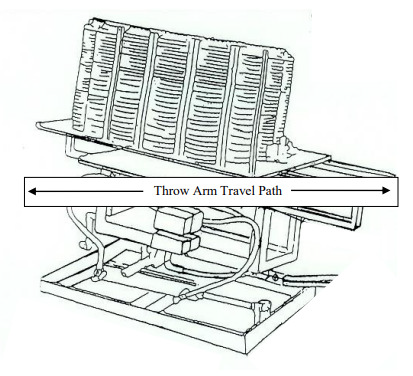
- NEVER STAND IN FRONT OF A TRAP MACHINE. THE TRAP MACHINE MUST BE TURNED OFF AND THE SPRING RELEASED BEFORE ENTERING THE TRAP HOUSE. NEVER ATTEMPT TO MAKE ANY ADJUSTMENT WHILE THE THROW ARM IS COCKED.
- NEVER ADVANCE THE THROW ARM BY HAND WHEN THE ON/OFF/RELEASE SWITCH IS IN THE ON POSITION. THIS MAY DAMAGE THE MACHINE.
- The target throw arm extends 4” beyond the throw plate. Keep away from moving parts. Never stand in front of the trap machine.
- When the machine is turned ON the throw arm will travel forward to the cocked position through the danger zone. When the throw arm is fired, the arm will travel through the indicated danger area zone. The throw arm can be fired by pushing the pullcord button. It can also be fired by hand; by pushing the arm forward off the brake when the machine is either On or Off.
LaPorte (Skeet Houses)
- NOTE: The “uncocked” position mentioned throughout this manual refers to the position of the throwing arm. When the machine is “uncocked”, viewed from behind the machine, the throwing arm is to the left of the machine. When looking at the machine from on top behind, the “uncocked” throwing arm is visible in a 9 o’clock position. When the machine is delivered, the throwing arm is in the “safe” position.
- Safety glasses must be worn by all personnel within close proximity to the trap to prevent eye injury from flying target fragments.
- Always keep children and animals away from the trap machine.
- All personnel required to operate the trap, or load targets into the magazine, should read this instruction manual and be trained by someone knowledgeable to the safe operation of the equipment.
- Do not leave the trap cocked when not in use. Not only is this practice very hazardous, but, as the mainspring is stretched, its lifespan will be shortened.
- Only one person should operate the trap at any time.
- Do not operate the trap without the safety guard installed on the trap as illustrated in this manual. This safety guard defines the danger zone of the throwing arm rotation.
- Do not lift or move the trap by the throwing arm, throwing plate or the safety guard. Do not lean on the safety guard or place any weight on it such as box of targets.
- Safety glasses must be worn by all personnel within close proximity to the trap to prevent eye injury from flying target fragments
- Always keep children and animals away from the trap machine.
- Before turning on any switches, move to a safe position at the left rear of the trap and make sure that no one is within a danger zone in front of the trap. High-speed fragments from broken targets may fly outside the normal target danger zone, even backwards. (They may even rebound off traphouse sides etc.). When trap is cocked and ready for use, always leave the area by keeping to the rear of the machine.
- Before approaching the trap, for any maintenance, adjustments, or for the loading of targets, be sure the trap is turned off with the “ON-OFF-UNCOCK” toggle switch on the electrical control box in the “OFF” position, and the throwing arm is in the “Decocked” 9 o’clock position.
- NOTE: TO UNCOCK THE THROWING ARM AND PLACE THE TRAP IN A SAFE CONDITION, MOVE THE “ON-OFFUNCOCK” TOGGLE SWITCH, ON THE ELECTRICAL CONTROL BOX, TO THE “UNCOCK” POSITION, THEN TO THE “OFF” POSITION. THE THROWING ARM SHOULD ‘THROW” AND STOP IN THE “UNCOCKED” POSITION OUT IN FRONT OF THE TRAP. THEN DISCONNECT POWER FROM THE ELECTRICAL CONTROL BOX.
Mec Trap (5-Stand House)
- CAUTION: ALWAYS OPERATE THE MACHINE FROM BEHIND, NEVER FROM THE FRONT OR THE SIDES OF THE MACHINE. KEEP HANDS AND BODY PARTS AWAY FROM THE MACHINE WHEN ARMING, RELEASING AND DISARMING.
- CAUTION: ANY MEC CLAY TARGET MACHINE MUST BE IN THE DISARMED STATE WITH THE BATTERY DISCONNECTED PRIOR TO MAKING ANY ADJUSTMENTS, OR LOADING THE CLAY TARGETS.
Firearm Safety
The Fundamentals of Firearm Safety
The three basic general rules of safe gun handling.
- Always point the muzzle in a safe direction; never point a firearm at anyone or anything you don’t want to shoot.
- Keep your finger off the trigger and outside the trigger guard until you are ready to shoot.
- Keep the action open and the gun unloaded until you are ready to use it.
Additional specific rules of safe gun handling
Safety Rules Related to the Shooter and His Behavior.
- Treat every firearm as if it were loaded.
- Never pass a firearm to another person, or accept a firearm from another person, until the cylinder or action is open and you’ve personally checked that the weapon is completely unloaded.
- Before handling any firearm, understand its operation.
- Never rely on any mechanical device for safety.
- Think before shooting: once you pull the trigger you can’t take back the shot you’ve just fired!
- Never joke around or engage in horseplay while handling or using firearms.
- Be alert at all times; never shoot if you’re tired, cold or impaired in any way. Don’t mix alcohol or drugs with shooting.
- Safeguard your sight, hearing and health. Always wear eye and ear protection. Endeavor to limit your exposure to heavy metal particulates and gases, and minimize your contact with aromatic organic solvents (such as those commonly used in gun cleaning products).
- If you see unsafe behavior any time when firearms are being handled or used, speak up and take action to correct the unsafe behavior at once.
- Receive competent instruction from a qualified person before beginning to shoot. If questions arise later, after you’ve been shooting for a period of time, get answers to those questions from a competent authority.
Safety Rules Related to Your Target.
- What’s behind your target? Always make sure that a stray shot, or a bullet which penetrates its intended target through and through, will be safely stopped.
- Never shoot at a hard surface, or at water — your shot may glance off, ricochet and injure someone.
- Never shoot at glass bottles, living trees, or inappropriate targets which would create a hazard for other persons or damage the environment.
- Never shoot a shotgun directly upwards, or at a high angle of elevation
Safety Rules Related to Your Firearm.
- Make sure your firearm is in good mechanical condition before firing it. Periodically have your firearm checked for signs of erosion, cracking, or wear by the factory, by a qualified armorer, or by a factory certified gunsmith.
- Never try to fire a gun which may have a plugged or partially obstructed barrel.
- Ensure that any modifications made to a firearm are made by a qualified individual, and that those modifications don’t interfere with your firearm’s safety features.
- Be sure all accessories, such as straps and grips, are compatible with the firearm and won’t interfere with its safe operation.
- It is your responsibility to ensure that your firearm is always either about your person and under your personal control, or positively secured from access by children or other unauthorized parties. Prevent tragedy: lock down your firearms when they aren’t in use.
- When storing a firearm for a long period of time, consider storing the slide, bolt, or other critical components of the firearm separately under separate lock and key.
- Avoid trying to catch a live round (while unloading a semiautomatic pistol) by cupping your hand around the ejection port while retracting the slide; doing so may result in an accidental discharge.
Safety Rules Related to Ammunition.
- Be sure your gun and ammunition are compatible. Shooting incorrect ammunition in a firearm may cause it to be damaged or even make it blow up.
- Relying on ammunition which doesn’t feed reliably in your particular firearm may make your firearm malfunction at a critical juncture: get experience with a particular lot of ammunition in your firearm before relying on it for defensive purposes.
- Use only ammunition recommended for your firearm by its manufacturer. Never fire ammunition which exceeds industry standard pressure specifications. Over-pressure ammunition will reduce the service life of your handgun, and puts you and those around you at risk of a catastrophic firearm failure.
- Use reloaded ammunition judiciously. Be aware that many firearms manufacturers specifically forbid the use of reloaded ammunition in their products, and will void their product’s warranty if you elect to use reloaded ammunition in contravention of their instructions.
- Also remember that a shell which has: the wrong powder, no powder charge, or too large a powder charge; an inverted primer, mis-seated primer, the wrong type of primer or an inert primer; a mis-seated, inverted, or mis-sized bullet; a collapsed, weakened, improperly sized or mis-crimped case; incorrect overall length or any of a host of other defects may seriously jeopardize your safety, the safety of those around you, and/or the reliability of your firearm in a defensive situation.
- Many shooters prepare and safely use reloaded ammunition each day, and it can be an economical way to stretch your ammunition budget, but the safety of that reloaded ammunition directly depends on the care, components, equipment, and practices used in preparing it.
- Carry only one gauge of ammunition when shooting. Accidentally grabbing the wrong ammunition while shooting can result in a shooter or third party being injured, or damage or destruction of a firearm.
- Store ammunition that isn’t being used under lock and key, inaccessible to unauthorized parties and children.
- Dispose of unwanted ammunition safely.
Miscellaneous Safety Rules.
- At a range, obey the commands of the range officers, or any individual calling `cease fire,’ at once. Read, know and follow any rules peculiar to a particular range which you may be using.
- Keep your fingers and other parts of your body away from the muzzle, the rear of the slide, and the ejection area of a semiautomatic shotgun.
- In the event of a misfire, keep the firearm pointed in a safe direction, remove your finger from the trigger, wait ten seconds, then eject the shell and dispose of it properly.
- If you hear an unusual sound upon squeezing the trigger or feel an unusual recoil, stop shooting and investigate. You may have experienced a “squib” load (or under-powered cartridge), and it may have caused a bore obstruction. Keep the firearm pointed in a safe direction, remove your finger from the trigger, wait ten seconds, then unload the firearm and safely examine the barrel, checking carefully for any possible obstructions before reloading and resuming shooting.
- Never —
- Scale or descend a steep incline or hill with a loaded firearm,
- Climb a tree, or climb into a hunting stand with a loaded firearm,
- Prop or lean a loaded firearm against a tree or other surface which may allow it to slide, or
- Transport a cased loaded firearm.
- Always carry your firearms in a way which will allow you to control where the muzzle is pointing, should you stumble or fall.
Pattern Board
- Pattern boards are located west of the club house.
- Pattern boards should be used with a new shooter to ensure that they are shooting where they are looking.
- Yardage is marked with bricks in ground to know range.
- Steel Plate Pattern Board
- Paint to see the pattern that you are getting with your gun.
- Cardboard Pattern Board
- Clamp cardboard to the frame and mark the center.
- Make sure down range is clear
Skeet Training
Skeet machine setup
- Open the Houses
- Open the thrower doors.
- Fill the carousels with clays.
- Turn on the Throwers.
- Toggle the (Disarm-Off-On) switch to the ON position. Located under carousel.
- Throwing arm will move under the Carousel.
- Connect the cord to the Controller Box.
- Connect the Strain relief to the post.
- Voice Activated Skeet Controller Field located in Field 2’s Low House.
- Can be used to shoot alone on off hours.
- Verify the key is in the Skeet position on the controller.
- Load LONGRANGE Controller with rounds from your card.
- Insert Card in Slot
- Push Yellow Button.
- Confirm round is transferred.
- Remove card.
- Repeat for all other shooters.
- Skeet Release Switch Operations
- High House – upper left button
- Low House – upper right button
- Doubles – Both Houses – lower center button
Don’t adjust the machine.
- Contact Don Kelly if work is required
- Label down equipment and contact Don Kelly with details of the issue. 920-619-3504
Skeet field shutdown
- Must release the arm to relieve spring tension. Releasing the spring will throw a bird.
- Toggle the (Disarm-Off-On) switch to the return to center (Disarm) position of the switch
- Throwing arm will be visible at the 9 o’clock position and switch will go to (Off) position.
- Close the Skeet Thrower Door after the release of spring.
- Cord wind up— start at switch end and wind to plug end using 6 foot loops.
- Hang the cord in the low house.
- Ensure high and low house doors are locked and the controller box is locked.
- Ensure the key set is returned to Lock Box.
- Clean up
- Members expected to break down empty clay boxes and deposit in the slot of the gray dumpsters located between each field.
- Pick up their hulls and shell boxes when done shooting.
Basic Skeet Rules and Techniques
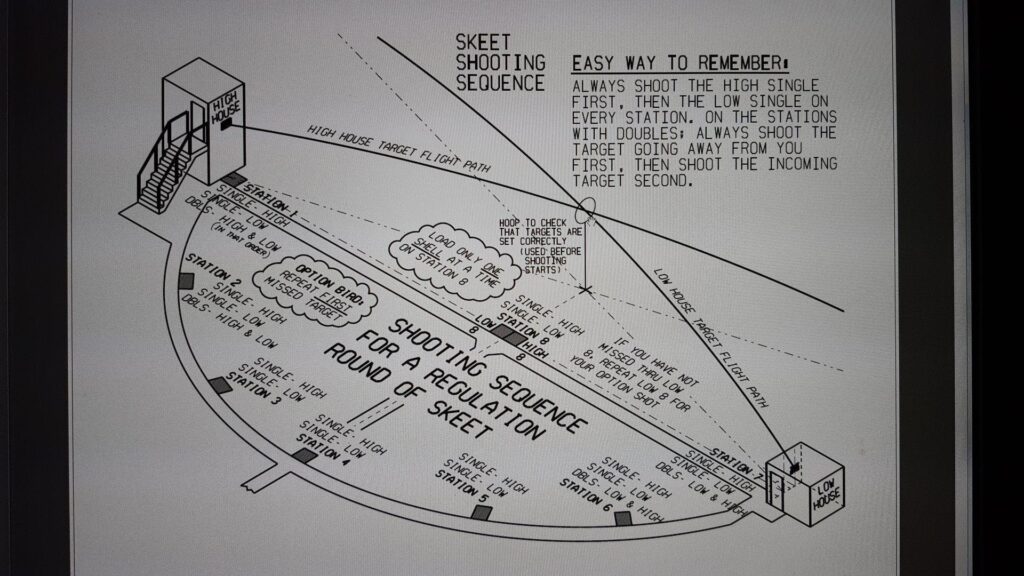
- Option Bird is shot on the first missed bird.
- Basic rules documents are embedded at the end of the document.
Advanced Training
- Contact Jim Decker for details on Advanced Training. 920-621-7503
Trap Training
Trap machine setup.
- Open the doors of the trap house and use the locking rods to hold the doors open.
- Raise the red flag while in the trap house.
- Ensure the hydraulics and throwers are turned off.
- Fill the throwers.
- Make sure everyone is out of the trap house.
- Turn on the hydraulics and turn on the thrower. Note: During winter, the Hydraulics pump may need to be run for a while for the oil to heat up before the thrower will cycle properly.
- Lower the flag after clearing the area.
- Take the speaker cart out of the storage container that is under the stairs of the upper skeet station.
- Place stand in the center of the trap field offset to the left of the center 16 yard position.
- Take the 5 speakers out of the cart and unwind enough cord to allow them to be located in front of the 5 shooting positions.
- Unwind the cord from the stand that is plugged into the trap house and plug it.
- Connect the trap plug to the receptacle at the trap house.
- Unwind the voice control remote to allow it to be located for easy access to the person managing the round
- Use the key to open the controller box.
- Load LONGRANGE Controller with rounds from your card.
- Insert Card in Slot
- Push Yellow Button.
- Confirm round is transferred.
- Remove card.
- Repeat for all other shooters.
- Ensure the switch in the controller box is set to trap.
- Turn on the voice activation after the squad indicates that they are ready to shoot.
- Don’t adjust the machine. Contact Jim Dudley if work is required. 920-819-1858
Trap machine setup and shut down.
- Turn off the Voice activation when the round is complete.
- Wind up the cords of the speaker, voice control remote, and the plug for the trap house.
- Place the speaker stands in the cart and secure it with the bungee cords.
- Return the cart to the storage under the stairs of high house 6. Lock the storage container.
- Toggle the (Disarm-Off-On) switch to the return to center (Disarm) position of the switch.
- Throwing arm will be visible at the 9 o’clock position and switch will go to (Off) position.
- Turn off the thrower and hydraulics switches.
- Close the doors on the trap house and lock.
- Clear any extra targets on the card reader.
- Lock the controller/card reader box
- Return the Key to the lock box.
Basic Trap Training
- Links to Trap rules.
5 Stand Training
Five stand startup and shut down.
- Open house front doors and secure of all eight stations
- Fill the throwers.
- Turn on the Throwers.
- Toggle the (Disarm-Off-Armed) switch to the Armed position.
- Throwing arm will move under the Carousel.
- Get out the controller from the stored location.
- Load rounds into the controller for all of the shooters
- Have all shooters get ready in the shooting stations.
- Use the LONGRANGE MT4300 controller to manage the throwers per the procedure in the controller box. (Go to FAQ in Web Site for details on Controller operation.)
Five stand startup and shut down.
- Toggle the (Disarm-Off-Armed) switch to the return to center (Disarm) position of the switch
- Throwing arm will be visible at the 9 o’clock position and switch will go to (Off) position.
- Close the doors.
- Doors cannot be closed until the thrower is disarmed. Disarming the thrower with the door closed will damage the thrower.
- Put controller away in field 6 lower skeet house.
- Ensure Low House 6 is locked.
Basic 5 Stand Training
- You can shoot a second round at the single bird.
- All broken birds count even if broken by a single shot.
- You may not leave your station until instructed to do so by the referee or until the last shooter has fired their last shot.
- Target Sequence is posted on the left side of each shooting station.
- Add links to 5 stand rules.
- Add links to basics in getting started in 5 Stand.
External Aids
- Who will do the member training?
- Can a member’s profile in the Long Range system indicate training competition?
- Links:
Five Stand Rules
Target Presentation and Scoring – As Defined in NSCA Rules
- Single Target
- Two shots are allowed, but not required. A target will be scored dead if broken by either shot.
- Pairs
- Only two shots are allowed. Pairs may be presented as report, following or simultaneous (true pair)
- In simultaneous pairs (true pair) the shooter has the right to shoot either of the targets first. A shooter may shoot twice at the same target. Regardless of the result, the other target will be scored as lost.
- When shooting report or following pairs, the shooter will have the right to shoot twice at the same target. Regardless of the result, the other target will be scored as lost.
- Scoring Pairs
- Should the shooter break both targets with either the first or second shot then the result will be scored as two hits.
- In the event of a no Bird on a simultaneous pair (true pair) or following pair, nothing can be established. Two good targets must be present to record the score. This will also apply for gun/ammunition malfunctions while shooting pairs.
- In the event of a NO BIRD on the second target of a report pair, the first bird will be established as dead or lost and the shooter will repeat the pair to establish the result of the second target. When repeating the pair, the shooter must make a legitimate attempt at the first target.
- In the event of a shooter malfunction on the first bird of a report pair, the first bird will be established as lost and the shooter will repeat the pair to establish the result of the second target. When repeating the pair the shooter must make a legitimate attempt at the first target. The first target has already been established as lost and the result of the second target will be recorded.
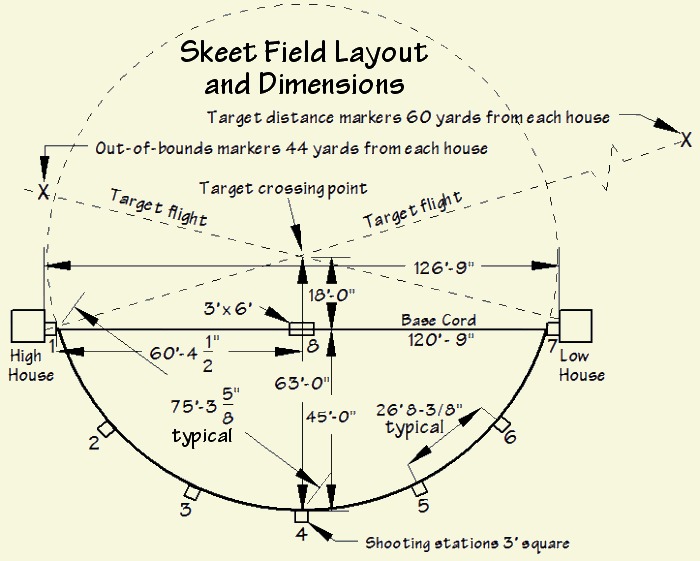
Reference image: Skeet
Figure 1 Lock Box to access the keys. Located on Light Posts 1, 3, 5, and 7
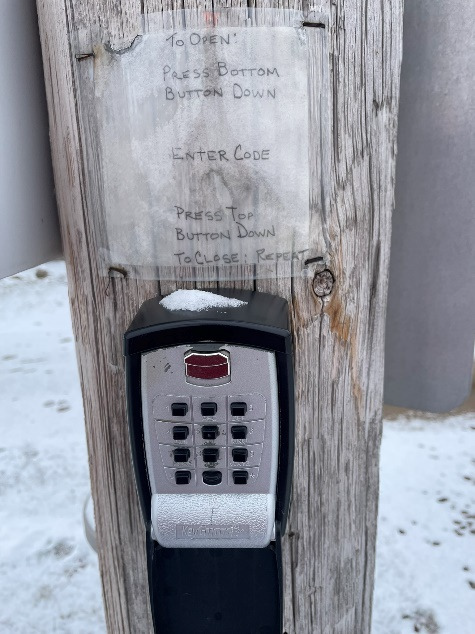
Figure 2 Skeet Thrower in shut down configuration – door closed – Arm in disarmed position – Switch in off position.
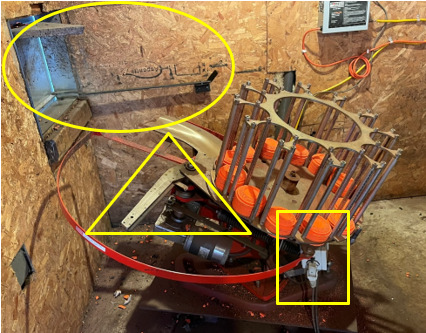
Figure 3 Skeet Thrower in shut down configuration – door open – Arm in armed position under carousel – Switch in on position.
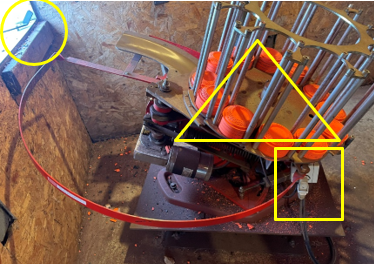
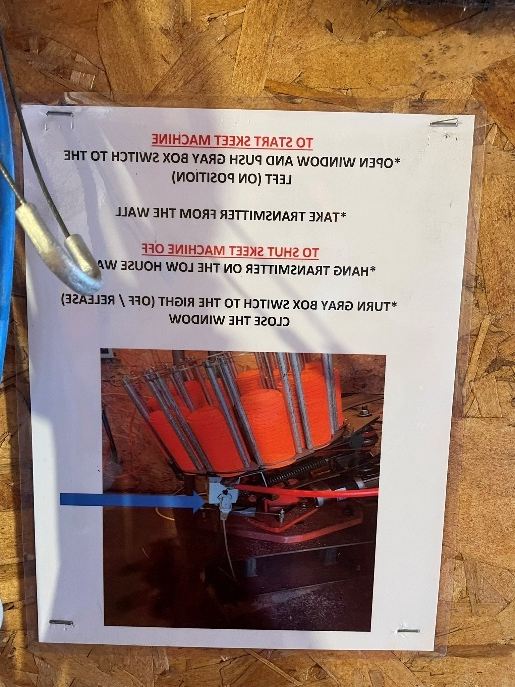
Figure 4 Instruction Sheet
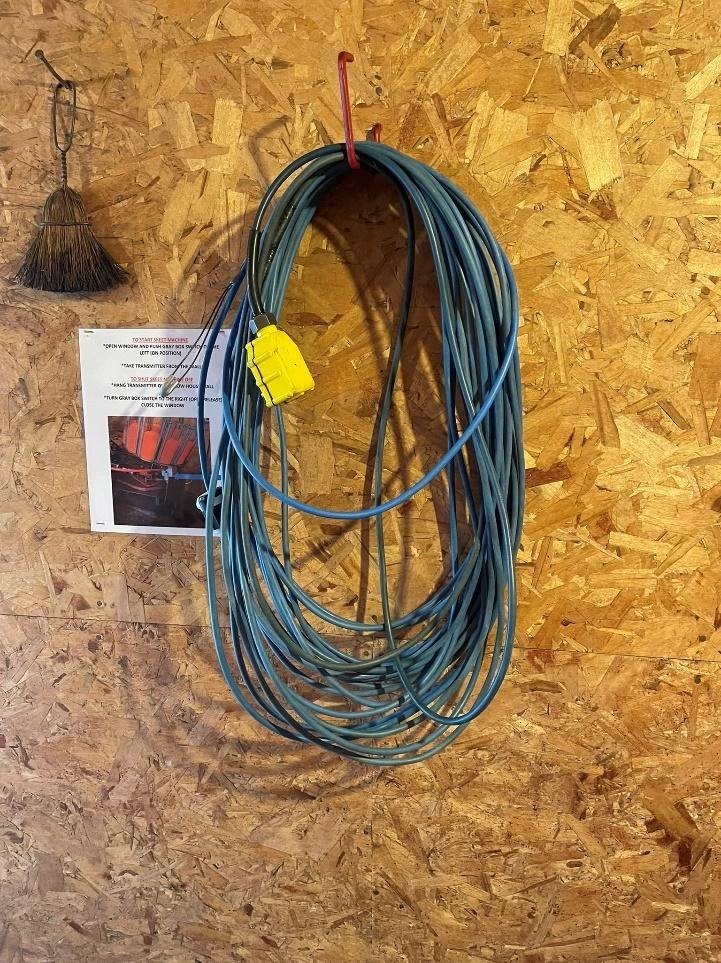
Figure 5 Push Button Cable
Figure 6 Cable Plug and Strain Relief
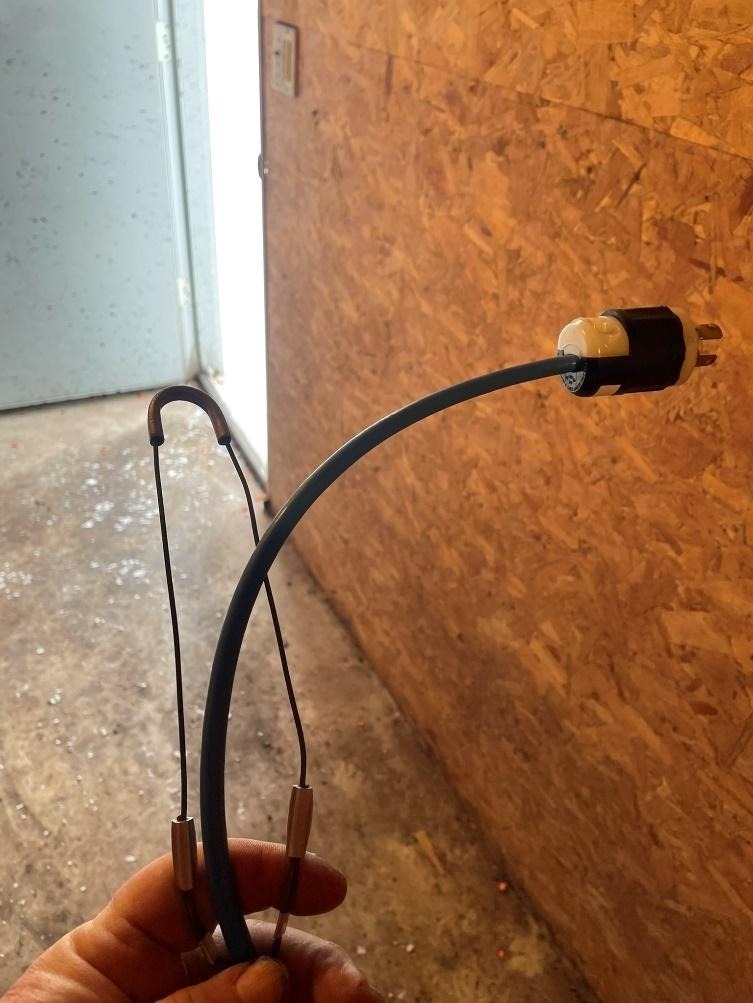
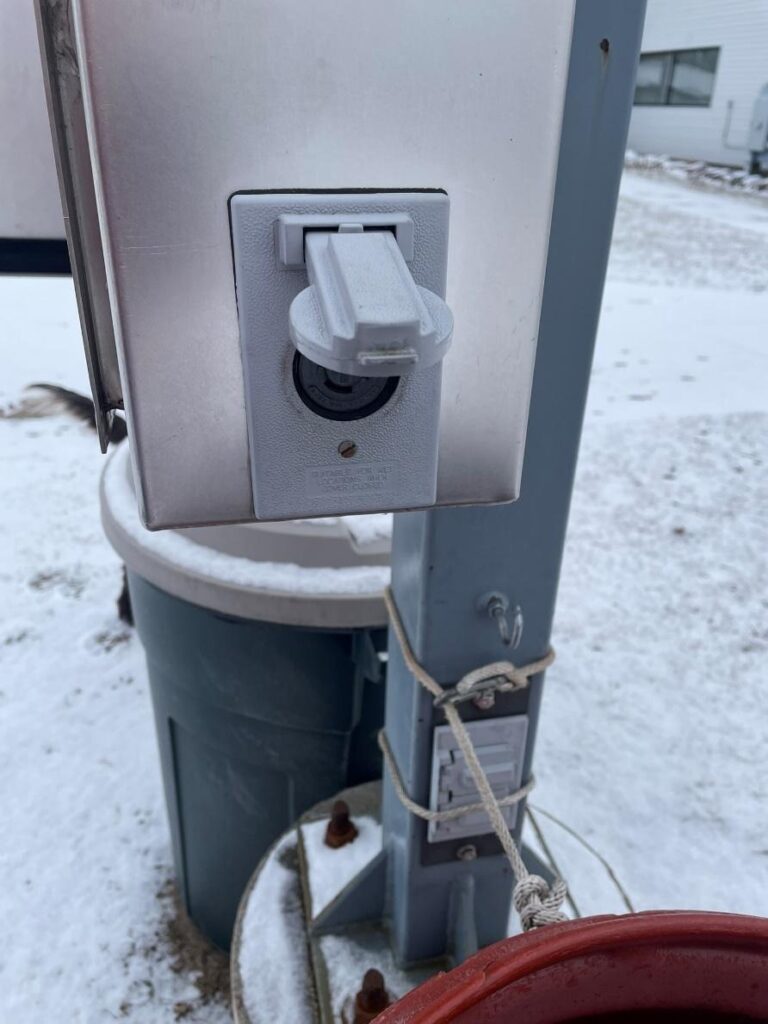
Figure 7 Skeet Plug and Strain Relief Hook
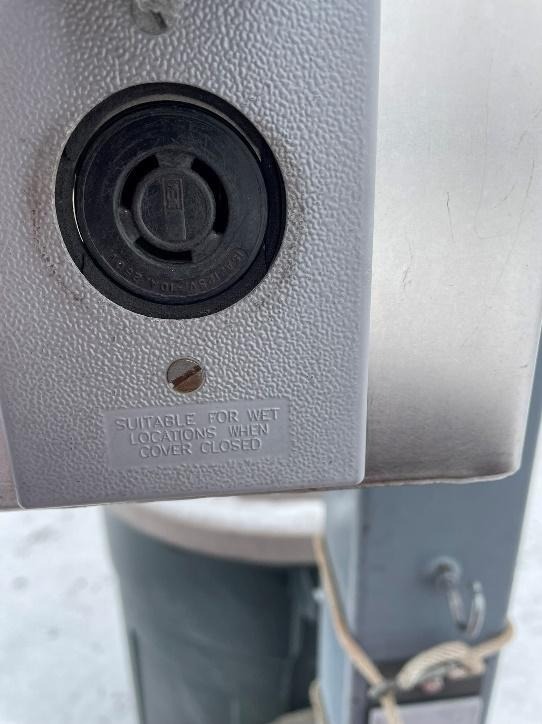
Figure 8 Twist Lock Skeet Plug Detail
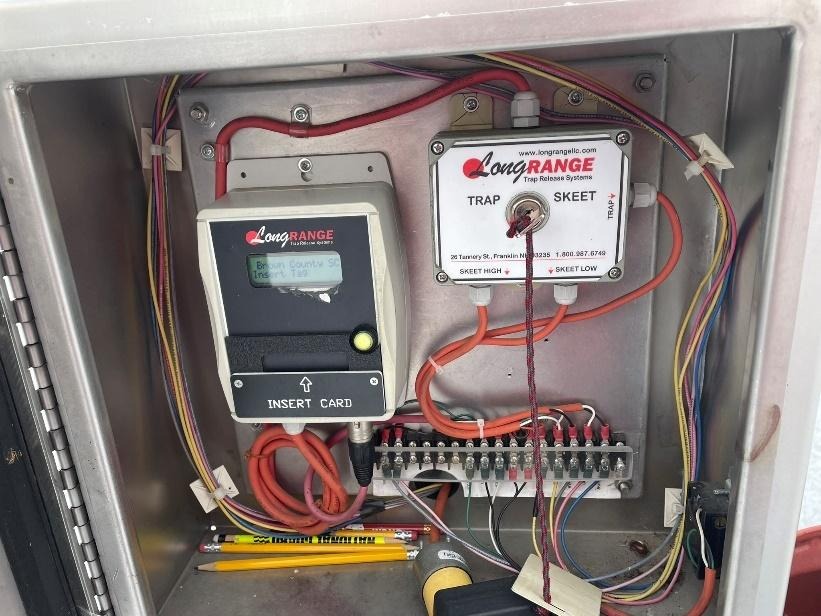
Figure 9 LongRANGE Control Panel
,
Figure 10 LongRANGE TAGCounter. Insert card, push yellow button, confirm count transfer, remove card. Repeat as required.
Figure 11 LongRANGE Selector Skeet or Trap. Confirm set to Skeet.
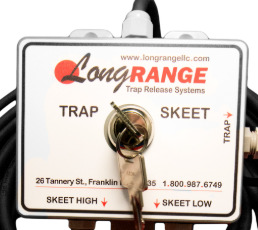
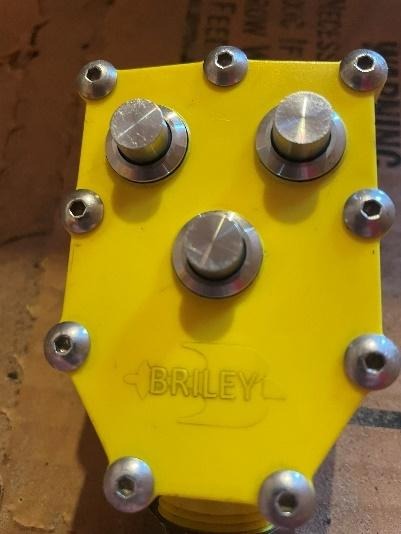
Figure 12 Push Button Handheld – Left – High Bird, Right – Low Bird, Bottom – True Pair
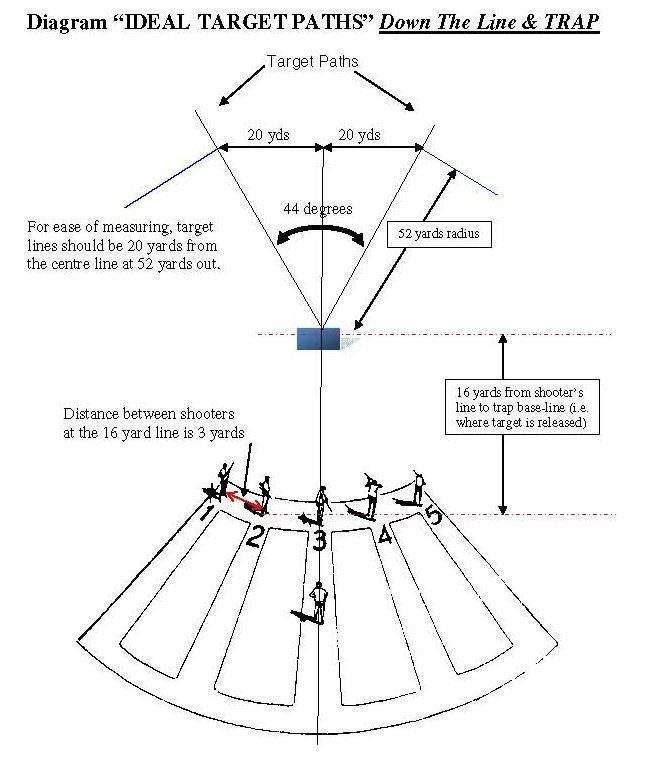
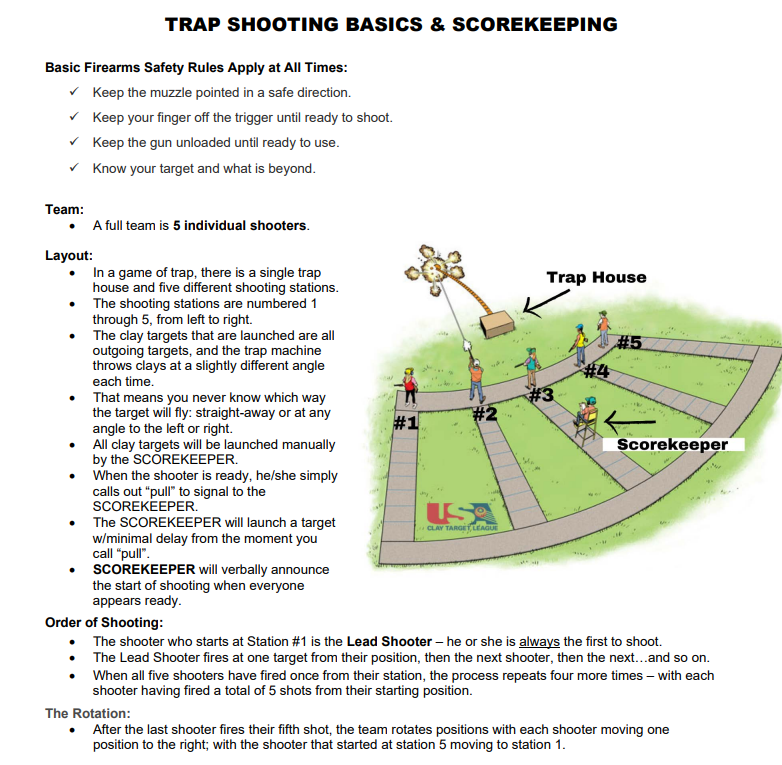
Reference image: Trap
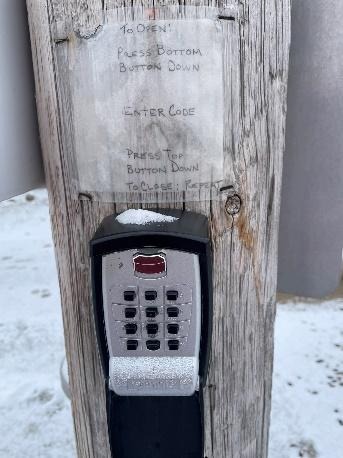
Figure 13 Lock Box to access the keys. Located on Light Posts 1, 3, 5, and 7
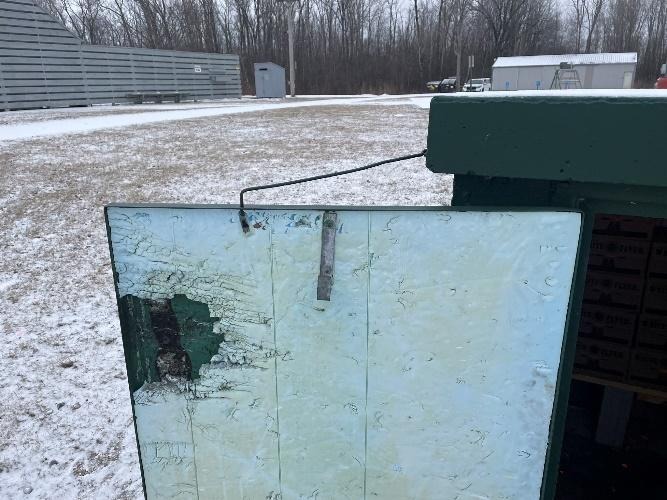
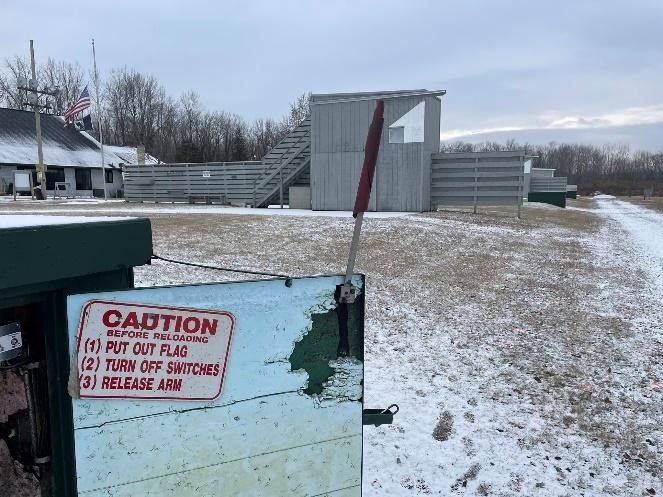
Figure 14 Right Door open with Flag up and hold open arm in place
Figure 15 Left Door open with Hold open bar in place.
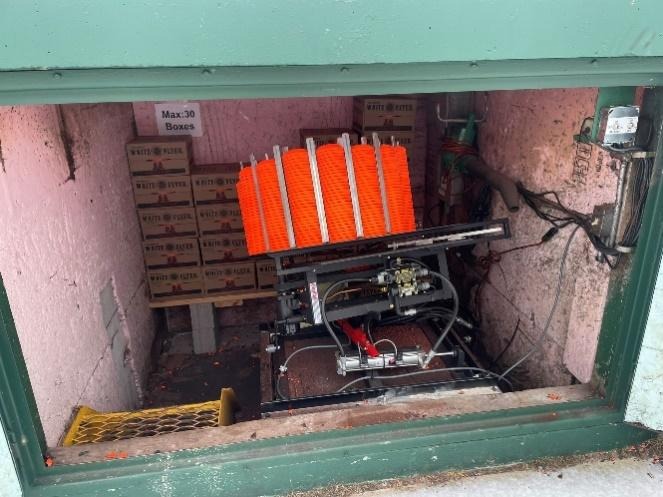
Figure 16 Inside of Trap house. Switches on upper right.
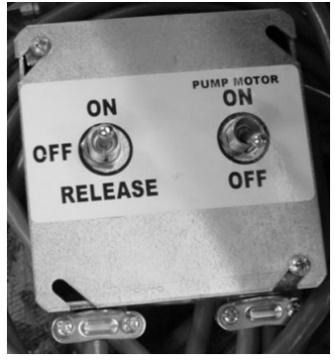
Figure 17 Hydraulic and Trap On/Release Switched – Release Bird and turn off pump when done.
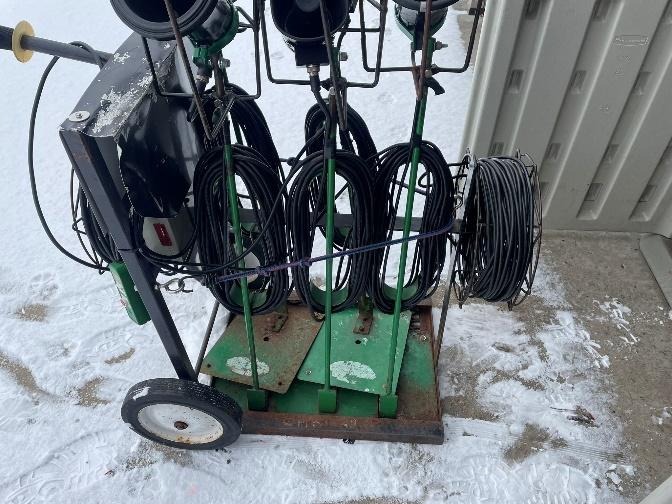
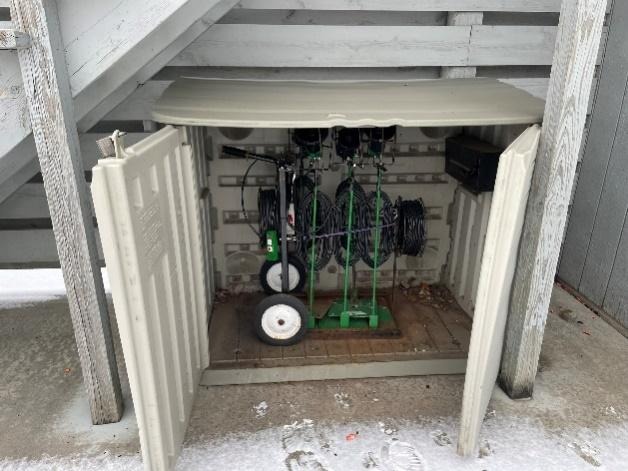
Figure 18 Voice Control in Storage Container. Close and lock when done.
Figure 19 Properly loaded cart. Use Bungy cord to secure stands and wind up all cables
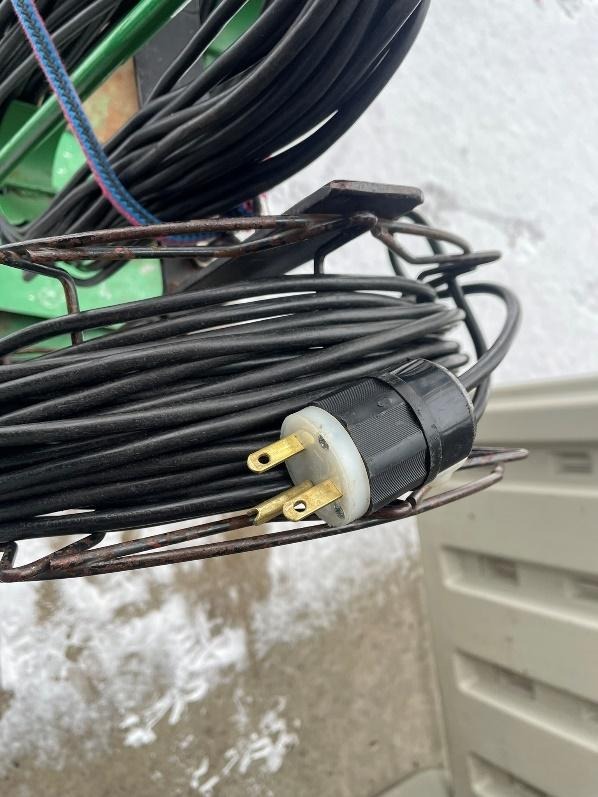
Figure 20 Plug to connect to Trap House
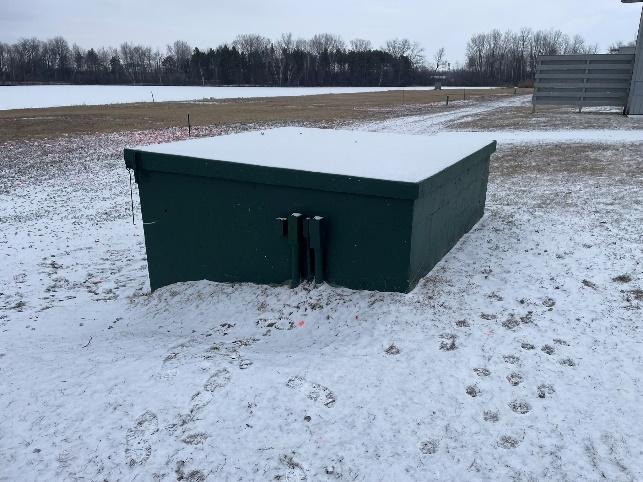
Figure 21 Side of Trap house with the Voice Plug.
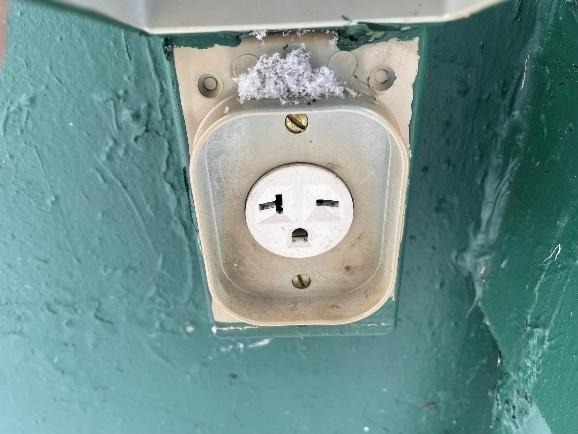
Figure 22Voice socket on trap house.
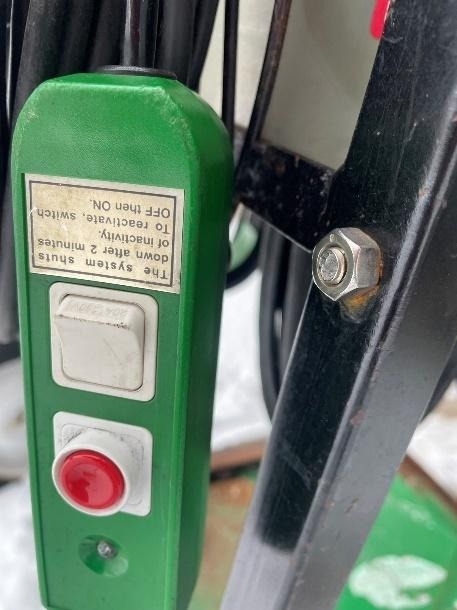
Figure 23 Voice Control -Toggle switch Mutes and Activates Voice. Red button is a manual Trigger.
Figure 24 LongRANGE TAGCounter. Insert card, push yellow button, confirm count transfer, remove card. Repeat as required.
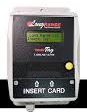
Figure 25 LongRANGE Selector Skeet or Trap. Confirm set to Trap.
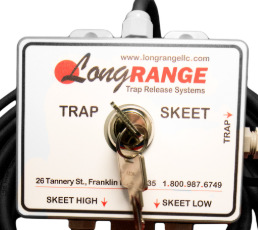
Figure 26 Oscillation (Traps 1-6) and Wobble Controls (Traps 5-6)
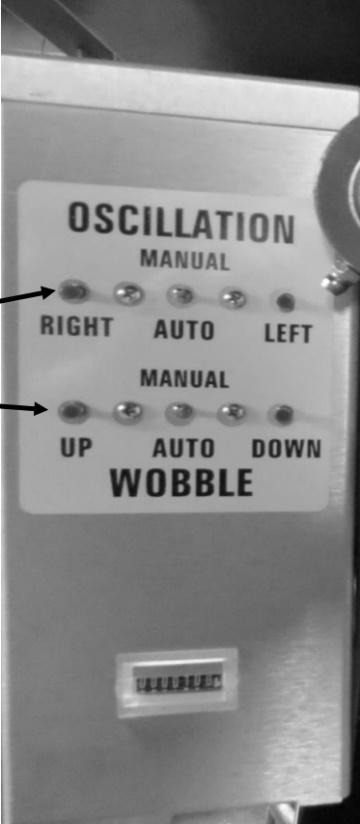
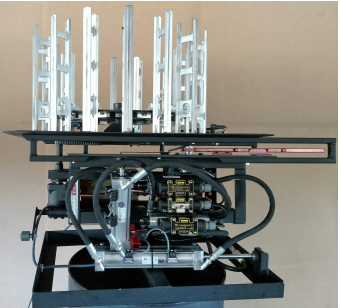
Figure 27 Wobble Trap Thrower Front View.
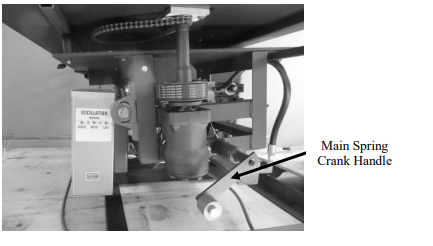
Figure 28 Spring Crank Handle
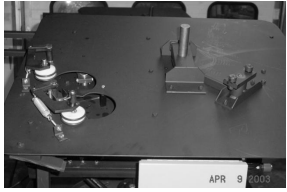
Figure 29 Lower roller is the Double/Single Roller.
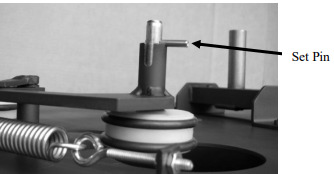
Figure 30 Single/ Doubles Roller (Double Position)
Reference image: 5-Stand
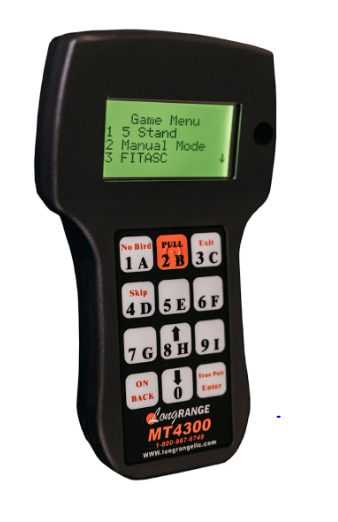
Figure 31 Arm/Disarm Pendent
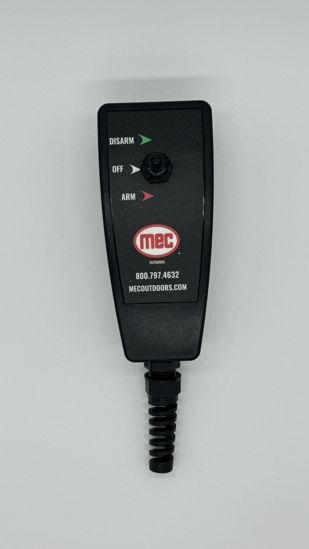
Figure 32 5-Stand Controller
Pat- Trap Setup for the Ironman/ 5-Stand.
Std Trap:
- Oscillation: Auto
- Wobble: Manual 20 Degree Tilt
- Spring: Standard Trap Position
Wobble:
- Oscillation: Auto
- Wobble: Auto
- Spring: Standard Trap Position
- Shooting Position:
- Week 1 17yd
- Week 6 19yd
- Week 10 21yd
Skeet:
- Standard setup. See skeet instructions above.
Doubles:
- Must use field 1. Only machine able to use doubles.
- Oscillation: Manual, Centered
- Wobble: Manual 23 Degree Tilt
- Spring: 10 turns beyond Single setting.
AUTOMATIC PAT-TRAP® DOUBLES NEVER STAND IN FRONT OF A TRAP MACHINE. THE TRAP MACHINE MUST BE TURNED OFF AND THE SPRING RELEASED BEFORE ENTERING THE TRAP HOUSE. NEVER ATTEMPT TO MAKE ANY ADJUSTMENT WHILE THE THROW ARM IS COCKED.
1. Standing clear of the trap machine, release the target. Push the On/Off/Release toggle switch all the way down to the release position and then let go of it.
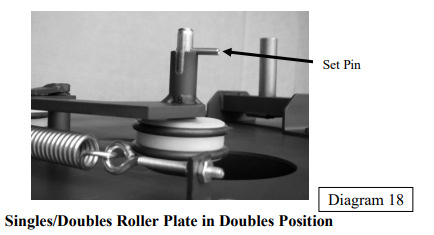
2. Pull back on the Roller Plate and move the set pin to the upper notch. (Diagram 18) Singles/Doubles Roller Plate in Doubles Position. On Field 6 lift the roller off and invert when replacing on shaft to configure doubles.
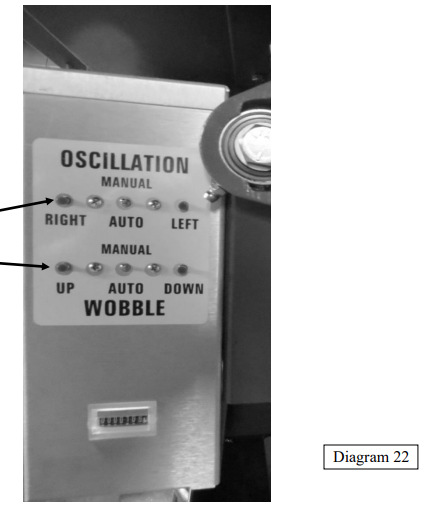
3. On the trap machine electrical box, the “Wobble” toggle switch must be pushed up to the Manual position (Diagram 22). This will stop the automatic vertical oscillation and will activate the Up and Down pushbuttons. The trap machine must be ON to operate the Up and Down pushbuttons. When the trap is On the throw arm is ready to fire. The throw arm can be fired by pushing the pullcord button. It can also be fired by hand: by pushing the arm forward off the brake when the machine is either On or Off. Staying clear of the trap machine, reach over to the power control box and turn the On/Off/Release switch to the ON position Use the up/down buttons of Wobble to Raise the elevation of the trap to achieve the 23º angle. Use the Angle Meter by mounting under the throw plate to measure the angle.
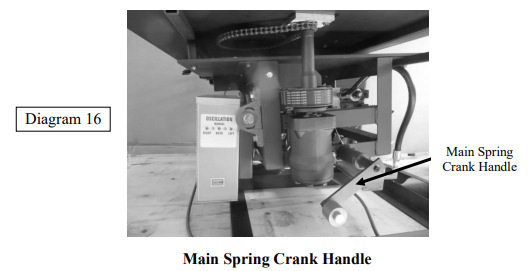
4. The spring tension must be increased to throw Doubles. Rotate the spring crank clockwise approximately 10 rotations from the Singles setting. (Diagram 16).
5. On the trap machine electrical box, the “Oscillation” toggle switch must be pushed up to the Manual position (Diagram 22). This will stop the automatic horizontal oscillation and will activate the Right and Left pushbuttons. The trap machine must be ON to operate the Right and Left pushbuttons. When the trap is On the throw arm is ready to fire. The throw arm can be fired by pushing the pullcord button. It can also be fired by hand: by pushing the arm forward off the brake when the machine is either On or Off. Staying clear of the trap machine, reach over to the power control box and turn the On/Off/Release switch to the ON position.
6. Use the Right or Left button to move the trap machine to the center of the trap field.
7. Before exiting the trap house, staying clear of the trap, reach over to the power control box and release the target.
8. Standing outside of the trap house and to the side, push the On/Off/Release toggle switch up to the ON position.
9. Be sure to reverse the setup at the end of the night.
- Spring: Unwound 10 turns.
- Wobble: Manual – 20 degrees
- Oscillation: Auto
- Height: angle to 20 Degrees
- Flip or drop roller to lower position to drop single targets.
XTrap
- Oscillation: On
- Wobble: On
- Spring: Standard Singles
5-Stand – Using Trap Trower.
- Oscillation: Manual – Centered
- Wobble: Manual – Max Up
- Spring: 5 turns in from Standard Singles.
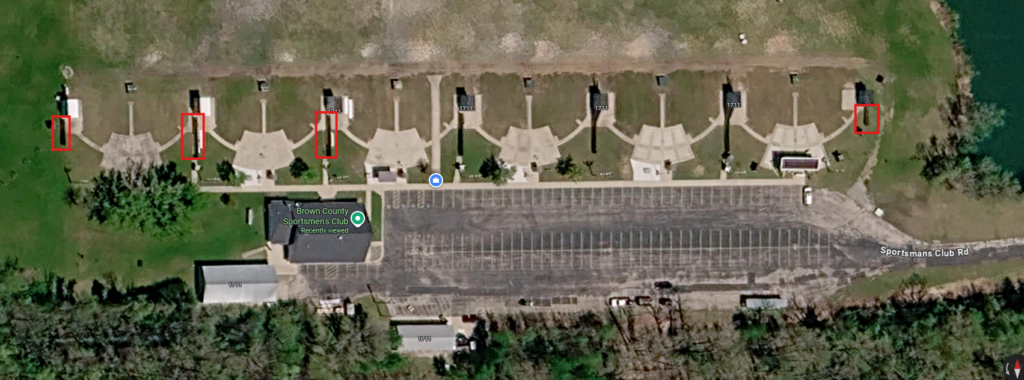
Skeet/Trap Field Over Overview
CONTACT INFORMATION
Brown County Sportsmen’s Club
1711 W. Deerfield Avenue
Green Bay, WI 54313
Phone: (920) 434-9930
CLUB HOURS:
Saturday 1 PM to 4 PM
Wednesday 9 AM to 1 PM
Tuesday Night Trap League 6:00 to 10:00
Wednesday Night Trap League 6:00 to 10:00 (Summer Only)
Thursday Night Skeet League 6:00 to 10:00
Board Members
Dave Holub 920-851-8625 President
Jim Decker 920-621-7503 Vice-President
John Kokoszka 850-570-6979 Secretary
Evan Parker 920-609-1500 Treasurer
Michael Cieslewicz 920-619-0478
Bill Collins 920-903-6519
Dave Conway 920-327-8762
James Dudley 920-819-1858
Jeff Herbst 859-393-3054
Ridge Johansen 920-562-4179
Kal Kerlin 920-819-0121
Mark Stephany 920-676-3548
Peter Thomas 262-825-6104
Adam Wehling 262-989-6848
Don Will 920-883-2196


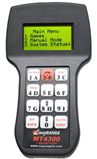

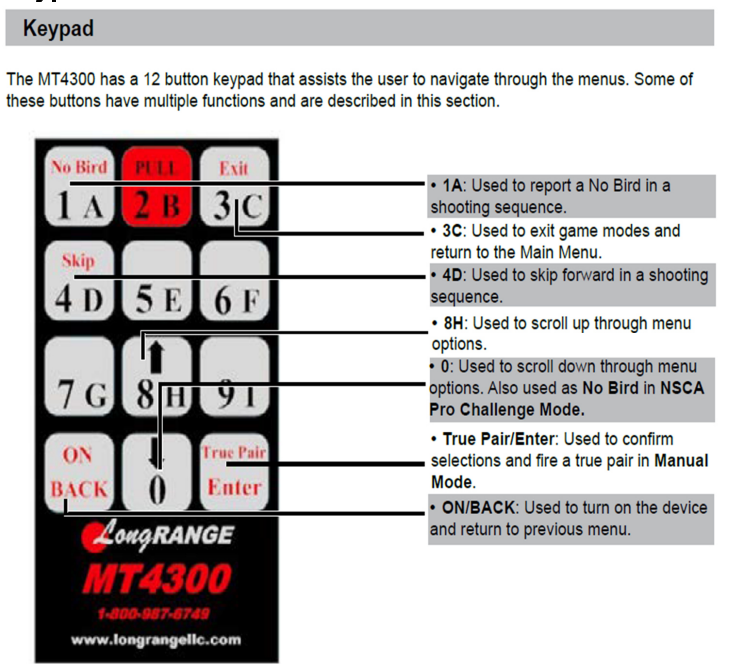
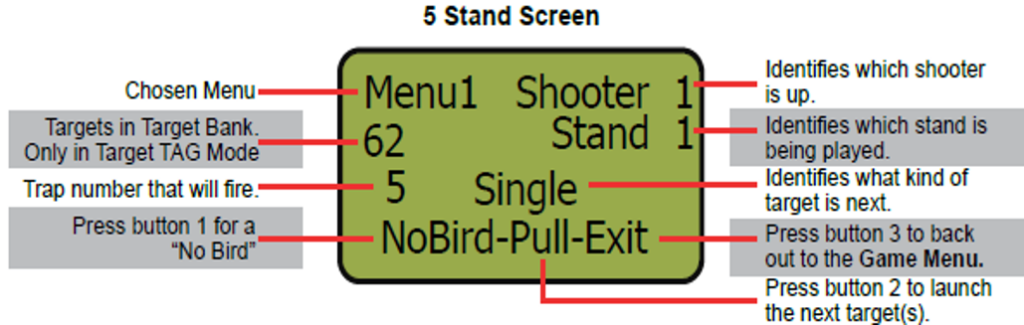
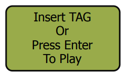 Be sure to be on the Insert TAG screen. Otherwise, the device will not recognize the card. From the Main Menu, press BACK to get to the Insert TAG screen. Insert the 5 Stand Card into the clip on the back of the MT4300. The screen will automatically take you to the Target Transfer Screen.
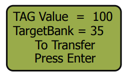 Once the card is inserted, the screen will display the TAG Value (amount of targets on the card) and the Target Bank (amount of targets loaded onto the device).
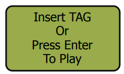 Press ENTER to go to the Main Menu.
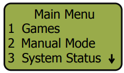 Press 1 to select Games and select your game from the game menu.
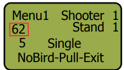 Play through your rounds as you normally would. Pay attention to the Target Bank that is displayed on the screen. When this hits zero, more targets will need to be added to the bank. To do this, see step 1.
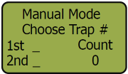 Each trap will have a corresponding number from 1 to 15. By pressing 1-9, the corresponding trap will instantly fire. To enter a trap with a double digit number, the zero button must be pressed first. The trap will fire as soon as the last button is pressed. For example, to fire trap 15 you must press 0, 1, 5. The trap fires when the 5 button is pressed.
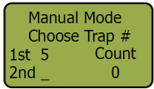 Each trap will have a corresponding number from 1 to 15. By pressing 1-9, the number will display next to the first trap. To enter a trap with a double digit number, the zero button must be pressed first. Press the zero button. The square cursor begins to blink. Now enter the corresponding double digit. The number will display next to the first trap.